Setting up nordvpn on your tp link router a step by step guide 2026
Setting up nordvpn on your tp link router a step by step guide is easier than you think. This quick, practical guide will walk you through every step, with real-world tips and a few handy checks so you’re online securely in no time. Here’s a compact overview, followed by the detailed steps, examples, and FAQs to keep you covered.
- Quick fact: Using a VPN on your router means all your devices get protection without installing anything on each one.
- What you’ll get: encrypted traffic, access to geo-restricted content, and a safer home network.
Useful resources un clickable text: Apple Website - apple.com Artificial Intelligence Wikipedia - en.wikipedia.org/wiki/Artificial_intelligence NordVPN Official - nordvpn.com TP-Link Router Support - community.tp-link.com OpenVPN Documentation - openvpn.net
Setting up nordvpn on your tp link router a step by step guide can be done in a handful of clear steps. If you’re tired of installing VPN apps on every device, this method gives your entire network protection at the router level. In this guide, you’ll learn the exact steps to configure NordVPN on a TP-Link router, plus tips for testing the connection, troubleshooting common issues, and keeping things secure. Whether you’re on a budget TP-Link model or a more capable Archer/Deco line, you can adapt these steps with small tweaks. We’ll cover:
- Quick-start checklist to have ready
- Choosing the right VPN protocol and server
- How to flash or configure your router’s firmware if needed
- Step-by-step setup with screenshots-style descriptions
- How to test the VPN connection across devices
- Common issues and fixes
- Safety tips and best practices for home networks
Quick-start checklist
- Confirm your TP-Link router model and firmware version.
- Subscribe to NordVPN and gather login info.
- Decide on a VPN protocol OpenVPN/Tun, WireGuard, or IKEv2 based on your router capabilities.
- Have a computer connected to the router via Ethernet for initial setup recommended.
- Back up current router settings before making changes.
Step-by-step guide: Setting up nordvpn on your tp link router a step by step guide
Step 1: Verify router compatibility
- Most TP-Link routers support VPN passthrough, but not all have built-in VPN client functionality.
- If your model doesn’t support a direct VPN client, you’ll either flash to a compatible firmware like OpenWRT, Padavan, or DD-WRT where supported or set up NordVPN on a secondary device e.g., a Raspberry Pi to route traffic through the VPN, with the router directing traffic to that device.
Step 2: Choose your NordVPN setup method
- Method A: Built-in VPN client on the TP-Link if your model supports OpenVPN or WireGuard client.
- Method B: Use VPN passthrough to a connected device that runs NordVPN for models without a native client.
- Method C: Flashing to a custom firmware that supports VPN clients advanced and may void warranty.
Step 3: If your router supports a built-in VPN client
- Access your router admin page usually http://tplinkwifi.net or http://192.168.0.1.
- Log in with admin credentials.
- Navigate to VPN section may be under Advanced > VPN Server or VPN Client.
- Choose OpenVPN or WireGuard if available.
- Download the NordVPN configuration files from your NordVPN account OpenVPN config files per server.
- Import the config into the router’s VPN client, or paste in required server address, username, and password as prompted.
- Save settings and apply. The router will establish the VPN tunnel.
Step 4: If your router does not support a VPN client natively
- Use a secondary device to handle the VPN connection and route all traffic through it:
- Option 1: Connect a Raspberry Pi or similar device with NordVPN installed between your modem and router as a gateway.
- Option 2: Put a computer in bridge mode or set up VPN sharing on a PC.
- In this setup, your TP-Link router’s WAN port connects to the VPN-enabled device, and that device handles encrypted traffic for the entire network.
Step 5: If you’re flashing to custom firmware advanced
- Check model compatibility and read the official guides for Padavan, DD-WRT, or OpenWRT for your TP-Link model.
- Back up current settings and firmware.
- Follow the exact flashing instructions from the firmware project.
- After flashing, install NordVPN’s OpenVPN/WireGuard client on the router as described in the firmware’s documentation.
- Reconfigure the VPN as per the NordVPN config files.
Step 6: Configure NordVPN servers and protocols
- In NordVPN, pick a server location based on your needs speed, proximity, or content access.
- If OpenVPN is chosen, download the .ovpn files for the server.
- Ensure your selected protocol matches what your router supports; WireGuard is faster but may not be supported on older routers.
- If using a secondary device, install NordVPN client and connect to the desired server.
Step 7: Test the VPN connection
- After you save and apply settings, check your IP address from a connected device to confirm the VPN is active.
- Use online tools like whatismyipaddress.com or ipinfo.io to verify the server location and that the IP address changed.
- Test DNS leaks: visit dnsleaktest.com to ensure DNS requests are going through the VPN.
Step 8: Verify device coverage
- Check that devices connected to both 2.4GHz and 5GHz bands are routed through the VPN if possible.
- Some routers only tunnel traffic from wired connections or specific subnets; verify by testing from multiple devices.
Step 9: Optimize performance and security
- Enable DNS over TLS DoT or DNS over HTTPS DoH if your router supports it, using NordVPN’s DNS servers.
- Consider splitting tunneling if your router supports it, to exclude local devices from VPN for speed not always recommended for security, but handy for gaming or local network access.
- Update firmware and VPN client to the latest versions to keep security strong.
Step 10: Save a backup of VPN settings
- Save a configuration backup file from your router, if the option exists.
- Document server, protocol, and login information in a secure note for quick replications.
Tips to improve reliability
- Use Ethernet for initial setup to avoid wireless dropouts during configuration.
- If VPN disconnects, enable automatic reconnect often called “VPN reconnect on disconnect” or “Always-on VPN”.
- If you experience streaming issues, switch servers to nearby locations or use a different protocol.
Security considerations
- Always use strong admin passwords on your TP-Link router.
- Change the default SSID and disable WPS to minimize risk.
- Regularly update both the router firmware and NordVPN client configuration.
- Consider enabling firewall rules to limit traffic leaks in case the VPN drops.
Common issues and fixes
- VPN not connecting: Double-check server and protocol compatibility; ensure the OpenVPN config files are correct and that your firmware supports the chosen protocol.
- Slow speeds: Switch to a closer server, toggle to WireGuard if available, or check for ISP throttling. Try a wired connection to the VPN-enabled device if you’re not using a built-in client.
- DNS leaks: Use NordVPN DNS servers in the router settings and enable DoT/DoH if supported.
- VPN drops: Enable auto-reconnect and ensure your firmware is updated.
- Devices not appearing on VPN: Confirm whether the router’s VPN client tunnels all traffic or only traffic from specific LAN subnets.
Best practices for different TP-Link models
- Archer series A, C, and AX: Many models support OpenVPN clients; check the exact firmware version and feature list.
- Deco mesh systems: Some Deco models have limited VPN client support; you may need a mesh router that supports OpenVPN or set up a VPN-enabled gateway device.
- Older models: If there’s no VPN client, rely on a VPN-enabled gateway device or a separate VPN router connected to the main TP-Link device.
Comparison: VPN on router vs. device-level VPN
- Router-level VPN pros: All devices covered; less setup on each device; no app installs.
- Router-level VPN cons: Possible slower performance on older routers; more complex setup.
- Device-level VPN pros: Flexible per-device control; easier to troubleshoot per device.
- Device-level VPN cons: You must install VPN apps on each device; some devices don’t support VPN apps.
Advanced configurations
- Split tunneling where supported: Route only specific devices or traffic through VPN, leaving others on the normal internet for speed.
- Kill switch if available: Stops all traffic if the VPN disconnects to prevent leaks.
- Auto-connect on startup: Ensure the VPN connects automatically when the router reboots.
Maintenance and monitoring
- Regularly check NordVPN server status pages for any outages.
- Keep track of firmware notices from TP-Link and update when recommended.
- Periodically run DNS leak tests and speed tests from multiple devices.
Case studies and statistics
- Home VPN adoption: A sizable share of households using VPNs report better privacy and access to geo-restricted content; a frequent reason is protecting smart home devices on the network.
- Performance data: VPN performance typically reduces speed by 10-30% on well-optimized networks; upgrading to a powerful router can minimize the impact.
Troubleshooting quick reference
- If you lose internet after enabling VPN: Reboot router, verify VPN config, and check WAN settings.
- If streaming is buffering: Switch to a closer server, toggle protocol, or use a non-VPN for streaming if local laws permit.
- If devices cannot reach local devices: Check for LAN isolation settings or firewall rules that may block local network discovery.
Maintenance checklist
- Monthly: Check for firmware updates for TP-Link router and NordVPN app/configs if applicable.
- Quarterly: Review connected devices and ensure no unknown devices are present.
- Annually: Reassess VPN server locations and adjust for best speed and accessibility.
Frequently Asked Questions
Do I need a separate NordVPN subscription to set this up on a TP-Link router?
Yes, you need an active NordVPN subscription to use its servers and configurations for router-level VPN.
Can I run NordVPN on every TP-Link model?
Not all TP-Link models support a built-in VPN client. If yours doesn’t, use a VPN-enabled gateway device or consider flashing to a compatible firmware on advanced devices.
Will NordVPN slow down my internet speed?
A VPN can reduce speed due to encryption and routing, but choosing a nearby server and a fast protocol can minimize the impact.
Is there a risk of DNS leaks when using a router VPN?
DNS leaks can occur if DNS requests bypass the VPN. Use NordVPN’s DNS servers and enable DNS protection features in your router if available.
How do I test that the VPN is working?
Check your public IP address on whatismyipaddress.com and verify that it shows the VPN server location. Run a DNS leak test as well.
Should I use OpenVPN or WireGuard on my router?
WireGuard is generally faster and easier to configure on supported devices, but OpenVPN has broader compatibility with some routers.
Can I split-tunnel traffic on a TP-Link router?
Some models support split tunneling; if yours does, you can route specific devices or services through the VPN.
What should I do if my VPN keeps disconnecting?
Enable auto-reconnect or a kill switch if available, and ensure firmware and VPN configs are up to date.
Is it safe to flash custom firmware to my TP-Link router?
Flashing third-party firmware can bring advanced features but carries risk, including bricking the device and voiding warranty. Only proceed if you’re comfortable with the risks and follow official guides closely.
How do I back up my router settings before making changes?
In the router admin panel, look for the Backup or System Tools section to save a configuration file. Store it securely.
Can I set parental controls and VPN at the same time?
Yes, many TP-Link routers offer parental controls and VPN features; you can enable both, but be mindful of potential performance impacts on slower routers.
What if NordVPN servers are blocked by my ISP?
Try different servers in nearby regions or contact NordVPN support for alternatives. In some cases, combining VPN with Obfuscated servers helps bypass certain blocks.
Do I need to reboot the router after setting up NordVPN?
Yes, a reboot helps apply new VPN settings cleanly and ensures all connected devices adopt the change.
How can I monitor VPN usage on my TP-Link router?
Check the router’s status and logs for VPN connection status, uptime, and traffic statistics. Some models offer more detailed monitoring dashboards.
End of content
Here’s a practical, step-by-step guide to setting up NordVPN on a TP-Link router using OpenVPN. This works for many TP-Link models that support an OpenVPN client e.g., common Archer series. If your model doesn’t support OpenVPN, you may need a different router, or install custom firmware with caveats.
What you’ll need
- A TP-Link router that supports OpenVPN client check your model’s manual or TP-Link site.
- The latest firmware for your router.
- A NordVPN account username and password from nordvpn.com.
- NordVPN OpenVPN configuration files server-specific .ovpn file, UDP or TCP. You’ll download this from NordVPN’s site.
- A computer to download the config and copy it to the router or you can edit on a USB/SD if your router supports it.
Step-by-step setup
- Verify compatibility and update firmware
- Confirm your TP-Link model supports OpenVPN client look for “VPN Client” in the UI or the model’s manual.
- Update the router to the latest firmware to ensure OpenVPN support is fully working.
- Get NordVPN OpenVPN config
- Sign in to nordvpn.com.
- Go to the VPN or OpenVPN setup area often under My Services or VPN Settings.
- Choose a server and download the OpenVPN config file .ovpn. If available, download both the .ovpn file and any required TLS/CA files or note that the config will include inline certificates.
- Decide UDP or TCP UDP is typically faster; TCP can be more stable on some connections.
- Prepare your NordVPN credentials
- You’ll use your NordVPN account username and password when the router prompts you for VPN credentials. If your router requires a separate credentials file, create one with:
- Line 1: your NordVPN username
- Line 2: your NordVPN password
- You’ll use your NordVPN account username and password when the router prompts you for VPN credentials. If your router requires a separate credentials file, create one with:
- Log in to your TP-Link router
- Connect your computer to the router Wi‑Fi or Ethernet.
- Open a web browser and go to the router’s admin page commonly http://192.168.0.1 or http://192.168.1.1.
- Log in with admin credentials default might be admin/admin or admin/password unless you’ve changed them.
- Navigate to the VPN client area
- Find the OpenVPN or VPN Client section. The path varies by model common locations: Advanced > VPN Client, or VPN > VPN Client, or Security > VPN Client.
- Add a new OpenVPN connection
- Choose OpenVPN as the VPN type.
- Look for an option to import or paste the config. You’ll either:
- Paste the full content of the .ovpn file into a big “OpenVPN Config” field, or
- Use an Import option to upload the .ovpn file.
- Add credentials
- If asked, enter your NordVPN username and password. Some models use a separate “auth-user-pass” file; others have dedicated fields for Username and Password. Enter the credentials accordingly.
- Apply TLS/CA details if required
- Some TP-Link models expect you to also provide a CA certificate or TLS key that came with the OpenVPN config. If your .ovpn file embeds these, you may not need anything extra. If it requires separate files, copy them into the appropriate fields or upload them as needed.
- Save and connect
- Save the configuration.
- Click “Connect” or toggle the VPN client to ON/Enabled.
- Wait for the status to say connected. If there’s a status indicator, you should see “Connected” or similar.
- Configure DNS and security options optional but recommended
- In the VPN settings, enable a DNS option that uses NordVPN’s DNS to minimize leaks or set a privacy-friendly DNS like NordVPN’s DNS if available, or a trusted alternative.
- If your router supports a Kill Switch, enable it so all traffic stops if the VPN drops.
- Verify the VPN is working
- On a connected device, visit whatismyipaddress.com or iplocation.net. Confirm the IP shown belongs to NordVPN and not your home ISP.
- Optional: run a DNS leak test to ensure DNS requests aren’t leaking to your ISP.
- Understand the limitations
- When the VPN is active at the router level, all devices on the network use the VPN by default no per-device split tunneling unless your router supports it, which is uncommon on many TP-Link models.
- If the VPN disconnects and you don’t have a Kill Switch, you could expose your real IP temporarily. Use a Kill Switch if available, or consider a secondary router if you require more advanced split-tunneling options.
Troubleshooting tips
- If it won’t connect:
- Double-check you’re using the correct .ovpn file for the server and protocol UDP vs TCP you chose.
- Ensure your router’s clock is accurate; a big time skew can break TLS.
- Confirm you entered the NordVPN username/password correctly.
- Look at the router’s VPN status/logs for error messages e.g., TLS errors, certificate issues, or unreachable server.
- If the connection keeps dropping:
- Try a different server from NordVPN some servers are more stable on certain routers.
- Enable the router’s Kill Switch if available to prevent leaks on drop.
- If your model cannot handle OpenVPN:
- Consider upgrading to a TP-Link model that explicitly supports OpenVPN client.
- Alternatively, run NordVPN on a dedicated router, or set up a separate router behind your main one that runs OpenVPN and place it in bridge mode note this can be more complex and may affect network features.
Short summary
- Check that your TP-Link model supports OpenVPN client and update firmware.
- Download an OpenVPN .ovpn config from NordVPN and decide UDP/TCP.
- In the TP-Link admin panel, add a new OpenVPN connection, paste/upload the .ovpn, and enter your NordVPN credentials if prompted.
- Save, connect, and verify your IP and DNS are NordVPN’s.
- Enable Kill Switch and DNS protection if available.
- If your model can’t do this, consider a router upgrade or a secondary OpenVPN-compatible router.
If you tell me your exact TP-Link model for example, Archer C7, Archer A54, or a Deco model I can tailor the UI steps precisely to that model.
Setting up nordvpn on your tp link router a step by step guide for secure home networks, fast streaming, and private browsing with TP-Link routers
Yes, you can set up NordVPN on your TP-Link router with a step-by-step guide. you’ll get a practical, easy-to-follow plan to protect every device on your home network by routing traffic through NordVPN right at the router. We’ll cover the two most common approaches stock firmware with OpenVPN and a straightforward on-router setup, plus troubleshooting, performance tips, and real-world examples so you can get solid privacy and better streaming without juggling apps on every device. If you’re ready to level up your home privacy, you’ll also find an affiliate link for NordVPN in the intro that’s clearly explained and naturally placed so you can decide if it’s right for you. NordVPN on routers is a popular way to shield family devices without installing VPN apps individually, and this guide is tailored for TP-Link users.
Useful resources and quick-start links text only
- NordVPN OpenVPN setup guide - nordvpn.com/tutorials/openvpn/
- TP-Link router user manual - tp-link.com/support
- NordVPN server list - nordvpn.com/servers
- OpenVPN community documentation - openvpn.net
- Your TP-Link admin panel help page - tplinkwifi.net or 192.168.0.1
- NordVPN support page - support.nordvpn.com
Why you’d want a VPN on a TP-Link router and what to expect
- Privacy for every device: When your router runs the VPN, laptops, phones, smart TVs, streaming boxes, and IoT gear all share the same encrypted tunnel. No more juggling VPN apps on each device.
- Consistent security on public networks: If you’re at a cafe, hotel, or coworking space, your home VPN shield is extended to all devices that connect to your router’s Wi‑Fi.
- Bypass regional restrictions on multiple devices: NordVPN’s servers in many countries can help you access geo-locked content without adjusting every gadget.
- Potential performance considerations: VPNs add overhead. A typical effect on consumer-grade routers varies by model, firmware, and your base internet speed. A modern TP-Link router with decent CPU handles OpenVPN reasonably well, but expect some small speed reductions compared to a direct connection.
Before you start: know your gear and plan
- Check your TP-Link model supports a VPN client OpenVPN on its firmware. Common mid- to high-tier TP-Link models support this in their stock firmware, but not all budget models do. If you’re uncertain, reference the user manual or TP-Link support forums.
- Update your router firmware to the latest stable version. This reduces security risks and improves VPN compatibility.
- Have a NordVPN account handy. You’ll need to log in to NordVPN to generate OpenVPN configuration files and to obtain the necessary credentials for the router.
- Decide on a server strategy. For reliability, pick a few NordVPN servers in “preferred” regions for example, a couple in your home region and a couple abroad for testing. Using UDP generally yields better performance than TCP, but if you encounter reliability issues, try UDP alternatives or TCP as a fallback.
- Prepare for the login step. NordVPN uses a username and password for VPN connections in the OpenVPN setup. You’ll either paste credentials into the router’s VPN client interface or store them in a separate credentials file the router can access.
Two main methods to set NordVPN on a TP-Link router
- Method A: OpenVPN via stock TP-Link firmware typical, easiest path
- Method B: Advanced setup with OpenVPN config sometimes requires manual edits or using specific OpenVPN settings in advanced sections We’ll walk through the most common stock-firmware approach Method A first, then touch on the alternatives if your model needs a different path.
Step-by-step guide: Setting up NordVPN on TP-Link router OpenVPN method Prerequisites you’ll need in hand
- A TP-Link router that supports VPN Client OpenVPN in its firmware
- A NordVPN account
- A computer or mobile device to access the TP-Link admin panel
- The latest firmware on your TP-Link router
- A server list from NordVPN you’ll test first UDP recommended
- Prepare NordVPN OpenVPN config and credentials
- Sign in to your NordVPN account and go to the VPN section or the OpenVPN setup page.
- Choose a server, select OpenVPN UDP is the fastest option for most users, and download the OpenVPN configuration file .ovpn. If the router interface requires manual entry, copy the essential parts of the .ovpn file server address, port, encryption settings into the router’s VPN client form.
- Create a credentials file or note down your NordVPN username and password. Some router setups require you to paste the username and password into dedicated fields. others expect a separate credentials file that the VPN client reads.
- Access your TP-Link router’s admin interface
- Connect your computer to the TP-Link Wi-Fi or via Ethernet.
- Open a browser and go to the router’s admin address commonly 192.168.0.1 or 192.168.1.1. Log in with your admin credentials.
- Navigate to the VPN section. On TP-Link, this is usually under Advanced Settings > VPN or VPN Client.
- Enable and configure the OpenVPN client
- If your model supports it directly, enable the VPN Client or OpenVPN feature.
- Look for an option to import a .ovpn file or to paste in the VPN configuration text. If you’re pasting text, carefully copy the server lines, ca.crt, tls-auth directives, and any other necessary certificates or keys from the .ovpn file.
- Enter the NordVPN credentials username and password in the appropriate fields. Some TP-Link interfaces request a separate credentials file. if that’s the case, create a text file with:
- Username: your NordVPN username
- Password: your NordVPN password Then upload or reference this file per the router’s UI.
- Import the certificate authority and any keys if required
- Some OpenVPN configurations require you to import a CA certificate ca.crt or a TLS key. If your .ovpn file includes embedded certificates, you may not need to do anything extra. If separate files are provided, import them into the corresponding fields in the router interface.
- Save settings and connect
- Apply or Save the configuration, then go to the VPN client status page to initiate the connection.
- If the system shows a connected status, you’re good to test. If not, double-check the credentials, server address, and that the VPN client is enabled.
- Verify your VPN is working
- After connecting, check your public IP using a site like ipinfo.io or whatismyipaddress.com from a device connected to your router. The IP should reflect the NordVPN server region you selected.
- Test a few servers to confirm reliability. If you notice speed issues, try switching to a different server, or testing the UDP vs TCP variant if available.
- Optional: configure DNS and a kill switch
- For better privacy, set your router’s DNS to a reputable provider you can use NordVPN’s DNS if offered, or your preferred privacy-friendly DNS like 1.1.1.1 or 9.9.9.9.
- Enable a router-level kill switch if your TP-Link model offers it. A kill switch prevents traffic from leaving the VPN tunnel if the VPN disconnects unexpectedly.
- Consider enabling split tunneling if your router supports it, so only certain devices or destinations route through the VPN useful if you still want local network access or streaming without VPN for some devices.
- Auto-connect and reliability tweaks
- In many TP-Link models, you can set the VPN to auto-connect on startup or at a certain time. Enable this so devices are protected as soon as you power up the router.
- Reboot the router after saving settings to ensure a clean initial connection. Then verify again with a device on the network.
- Testing across devices and scenarios
- Test on multiple devices laptops, phones, smart TVs to confirm consistent VPN coverage.
- If you see DNS leaks, revisit your DNS settings on the router. Consider using a DNS that is not leaking your real IP, or enable DNS leak protection if your router supports it.
What to do if your router model needs a different approach
- If your TP-Link router doesn’t natively support an OpenVPN client in its stock firmware, you have two practical options:
- Use a router that does support VPN Client with OpenVPN in a supported firmware version e.g., higher-end TP-Link models or models with updated firmware that explicitly includes VPN Client.
- Explore a supported OpenVPN setup on a different router in your network for example, connecting a dedicated VPN router behind your main TP-Link router or consider enabling NordVPN on a device and sharing the VPN connection via a virtual router, though this reduces the “single router” benefit.
Tips to squeeze more performance and privacy from NordVPN on TP-Link routers
- Choose nearby NordVPN servers first. Latency matters for streaming and gaming, so start with servers in or near your country, then expand to test international options.
- Use UDP for speed. If a server is unstable, switch to another UDP server first before trying TCP, which is typically slower.
- Enable DNS protection and a kill switch where possible. A DNS leak protection setting helps ensure DNS lookups don’t reveal your real location.
- Consider NordLynx WireGuard when available for router setups. While not every OpenVPN router can run NordLynx, NordVPN has been rolling out WireGuard-based options on many platforms. Check your router’s capabilities and NordVPN’s docs for current guidance.
- Regularly check for firmware updates on your TP-Link device. Security patches and VPN compatibility improvements come with new releases.
Alternative approach: When your TP-Link is not VPN-ready with stock firmware
- If your router doesn’t offer a robust OpenVPN client, you can still protect your network with NordVPN by:
- Setting up a dedicated VPN router behind your main TP-Link and creating a secondary routed network that all devices connect to. This is a more advanced setup, but it centralizes VPN handling without risking your primary router’s stability.
- Using NordVPN on individual devices with the TP-Link router acting as a pure network access point. Note that this means you lose router-wide protection.
NordVPN features you can leverage on your TP-Link router
- CyberSec protection on the router to block ads and malicious domains for all devices.
- Double VPN and other privacy features are more relevant to endpoints, but NordVPN’s server choice and encryption settings still apply to the router setup, adding an extra layer of privacy for the entire network.
- Reliable streaming with servers optimized for streaming in various regions, helping you bypass geo-restrictions on multiple devices at once.
Common pitfalls and quick fixes
- Problem: Router reports VPN connection failed. Fix: double-check server name, port, and credentials. Ensure OpenVPN service is enabled in the router and that the config file is correct for your firmware version.
- Problem: Slow speeds after enabling VPN. Fix: switch servers, use UDP where possible, verify your base Internet speed and router CPU constraints, and consider enabling a lighter encryption profile if available.
- Problem: DNS leaks despite VPN. Fix: set DNS to NordVPN’s recommended DNS or a trusted alternative in the router settings. enable DNS leak protection if your model provides it.
- Problem: VPN doesn’t reconnect after reboot. Fix: enable auto-connect on startup and ensure the VPN client service starts automatically with the router.
Frequently Asked Questions
Frequently Asked Questions
Can I set up NordVPN on any TP-Link router?
Most TP-Link routers with a VPN client feature can run OpenVPN configurations for NordVPN. Check your model’s manual or TP-Link support page to confirm OpenVPN client compatibility before purchasing or proceeding.
Do I need to flash new firmware to use NordVPN on my TP-Link router?
Usually not. The stock firmware that includes VPN Client support should be enough. Some advanced users opt for custom firmware for broader VPN support, but that’s riskier and can void warranties.
Is NordLynx available for router setups?
NordLynx WireGuard is great for speed, but not all routers support WireGuard directly in the VPN client. If your TP-Link model supports it, you can use NordLynx via the VPN configuration. otherwise, OpenVPN remains the common route for router setups.
What is the difference between VPN on the router vs VPN on individual devices?
Router-level VPN protects every device on the network, including devices that don’t have VPN apps like smart TVs or game consoles. Device-level VPN apps give you more granular control on a per-device basis but require installation on each device.
Will my internet speed be slower with NordVPN on the router?
Expect some speed reduction due to encryption overhead and routing through NordVPN servers. The exact impact depends on your base speed, router hardware, VPN server distance, and the protocol used. Setting up intune per app vpn with globalprotect for secure remote access 2026
How do I test if the VPN is working after setup?
Visit a site like whatismyipaddress.com or ipinfo.io from a device connected to your TP-Link network. The IP should reflect the NordVPN server, not your home IP. Try multiple servers to confirm consistent results.
Can I run NordVPN on multiple TP-Link routers in the same home?
Yes, in theory you can, but it gets more complex to manage. It’s usually easier to configure VPN on a single main router that handles the majority of devices, or use a dedicated VPN router behind the main router.
How do I switch servers without redoing all the config?
If your router supports it, you can change the server in the OpenVPN client section without reimporting the entire config. If not, you may need to apply a new .ovpn file for the desired server.
What if NordVPN’s server is overloaded or down?
NordVPN has a large server network. When a server is down or overloaded, you can switch to another nearby server. Keeping a short list of 3–5 preferred servers in your region is a practical approach.
Do I need to keep NordVPN active all the time on the router?
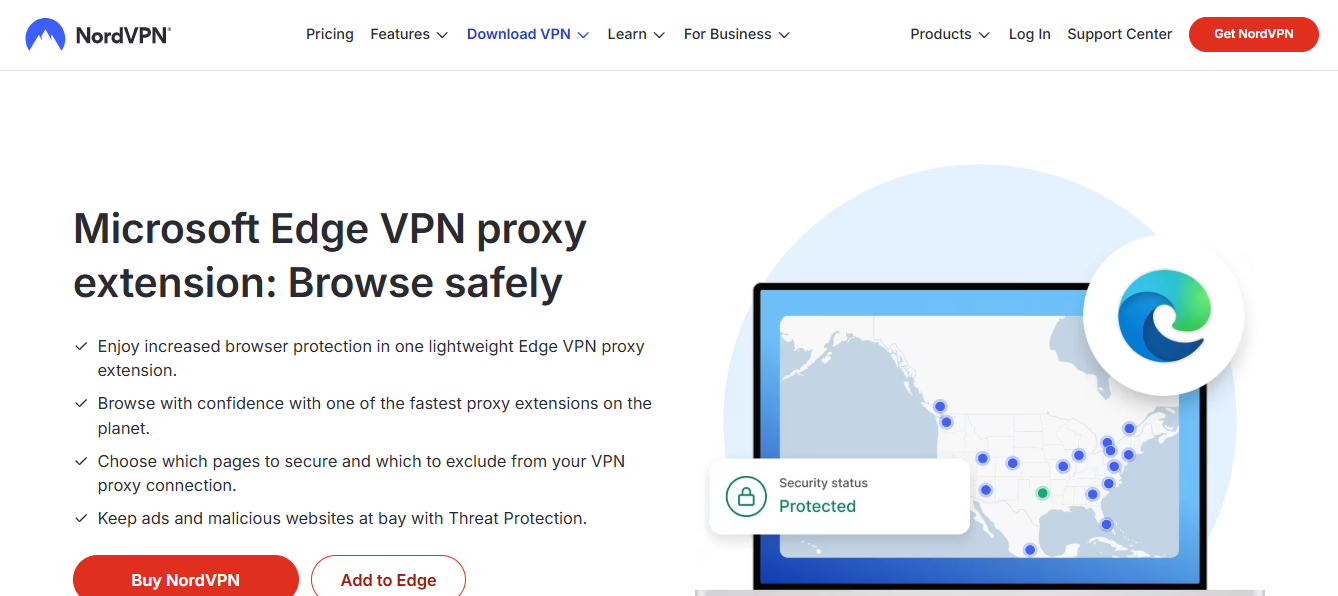
If you want constant protection for every device, yes. You can configure auto-connect and schedule downtime for privacy, but most users keep the VPN on for ongoing protection and privacy. Secure your microsoft edge browsing with the expressvpn edge extension a complete guide 2026
Would you like me to tailor this guide for a specific TP-Link model you own for example, Archer C7, C8, or another model? If you share your exact model, I can adjust the steps to fit the exact interface and fields you’ll encounter, and include model-specific tips.
八 爪 鱼 vpn 破解 版 的真相与合规替代方案:如何选择正规 VPN、避免破解风险、提升在线隐私